Showing posts with label new house. Show all posts

Friday, December 20, 2013

Extra Bedroom On Suite Updates

Remember how I said in my previous posts on the extra bedroom closet that we were gonna have a guest stay and use the whole the suite for a week. Well, that meant more than just the closet needed some help. The bathroom needed  some help too. It HAD to have a shower curtain. Showering without a curtain would equal disaster....plus that would just be weird. Also, it needed some cozy-ing up. A few touches....now I didn't wanna go over the top. This is an extra bedroom that I hope one day is a child's room....so I just want things that are usable in the long run (and I'm cheap...nuff said). Here's a quick pic of it before I hung the curtain rod:


I decided since this is hopefully to be a child's room at some point that I did not want a tension shower rod. I mean I can just imagine how many times a tension rod could be pulled down over the course of a kids life....and I wanted to go ahead and prevent any future gooseeggs gotten in a tension rod incident. Plus I love poles...remember! But do you know how hard it is to find a solid rod with shower rod flanges!? I couldn't find them at Lowe's or Home Depot in store. Here's what I ended up getting:

I grabbed this rod from Home Depot.com.

The rod actually came with flanges, but they were plastic and were not the kind you screw into the wall. Instead they had rubber end caps that made your solid rod fit more like a tension rod. What's the point in that? I mean really...if I am gonna go through the trouble to but a shower curtain rod from Home Depot and not somewhere that carries fancy, schmancy ones then I am most definitely screwing this puppy to the wall. 

so I snagged these flanges from Lowes.com.
Barclay 2-Pack Polished Nickel Flanges
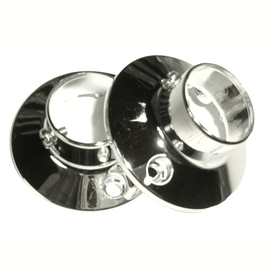
Perfect fit for the pole!

It was also really hard to find a shower curtain that I liked....that was long enough really. I mean I am "Sarah Plain and Short" why are all shower curtains made froo-froo or doo-doo!? Really, they either have frills and ruffles or they are like PVC crappy stuffs. Anyhow, I LOVE the shower curtain I ended up getting. It's a Hookless White Waffle 86 inch length Shower Curtain and fits the space and my personality. It has a snap on liner that can be thrown in the wash without removing the whole curtain! Score for easy-peasyness!

So here's how we went about business:

#1- Measured the distance and used a Hacksaw to cut the pole the appropriate distance.
#2- Based on the Shower Curtain I bought we measured how high on the wall we needed the flanges to be. We then held one flange in place and marked the holes that were necessary. We predrilled the holes in the wall and placed anchors for the screws in the wall....make sure this thing aint coming down if you swing on it! We went ahead and screwed the one flange on the wall.
#3- Took the cut rod and used painters tape to attach my longest level to it. (Now if you're fancy, you may have a magnetic level....but me I went with the redneck version and it worked.)
#4- I slid the unattached flange onto the rod (with the level attached) and then slide the other end into the flange attached to the wall. I just kept moving the rod til all was level and then marked the new spots on the wall where the second flange would go.
#5- Predrilled holes for anchors for the second flange.
#6- Popped the pole (without the level...lol) with the unattached flange on one end into the attached flange and then drilled the screws into the waiting anchors on the unattached end.

Here's the end result:

Here's a closeup of the flange attached to the wall. This pic also shows the waffle knit on the curtain....as well as the sheer light panel on the curtain.

Hanging the curtain high makes the ceilings look uber tall. I thought about going with the 96 inch length ones like my regular window curtains, but I liked where the light panel hit on this 86 inch one....so that's where I ended up.

I added a few more finishing touches too. Like this tiered fruit basket that I got on clearance for $6 for my kitchen but then it didn't fit underneath my kitchen cabinets....filled with extra TP and washclothes, it fits wuite nicely on the vanity.

I also added these Brushed Nickel Towel Bar Hooks by Moen. I absolutely love these! They came 2 per package. So I added one to the towel bar in the bathroom and three to the one in our master. They are super awesome. You can actually hang your full-size body towels from them. I HIGHLY recommend them. We have a 12 inch towel bar (yes, that is one foot) in our master and we hang 3 full size towels off of it daily, and they all dry easily now....and they look at lot better than cramming towels on a towel bar. Here's a pic of the hook up close. It comes with inserts to fit any size bar.

And here's a shot of the full bathroom:

You can't see the towel bar in this shot...but trust me those hooks are awesome-possum!


Affiliatelinks 


Sunday, December 15, 2013

Extra Bedroom Closet Overhaul: Phase 5- the finish!

So I am back to share finished pics of the closet....warning though, the pics are not that great. Andddddd I decided I was too lazy to care or to fix them. But you don't care right? You just want to see the end result. So without furthur ado....THE EXTRA BEDROOM CLOSET after caulking and painting:

Here's the side with hanging bars:

 And here's the side with only shelving:

Sorry, I thought about styling the shelves before I took these pics, but nope....decided against the unrealistic look. This is real...a lonely PB light still in the box on the shelf. That's the real closet. BUT....we have had a guest who stayed in the room for a week and used the closet daily. Score!! It is usuable...lol!

Here's a few "closer-up" shots:


Let's take a look back real quick and see where we started.
I'd say it's a vast improvement over that!

Yay! I love getting things done. I know this was the most interesting post ever to you, but hey....this is life. We're being real.

To see previous Extra Bedroom Closet Overhaul posts click the links:
Phase 5- the finish

Note: I was not given anything in this post. I purchased everything myself and was not compensated to post my opinions about it. I simply listed my supplies purchased with my own monies for the benefit of you, my wonderful reader friends.

Affiliatelinks 

Wednesday, July 17, 2013

Extra Bedroom Closet Overhaul: Phase 3- Poles and Pole Holes

Remember the closet I took apart and now have to put back together?? Well, it needed poles. Enter wonky non-edited picture of my blank walled closet.

Ya'll all know how I like poles...you can read all about that here so......I am excited to tell you that the closet now has poles! What what! High-five self! So here's how that came into play. First, I bought some supplies. 

Now, I will be honest on the supplies...I had no clue what the pole hole was called. No, surprise, surprise "pole hole" is not a technical term. You know what I'm talkin' bout though, right? The little metal or wood holes that hold the closet poles (or as some most might call them closet rods) to the wall. So I did some digging on the internet and found out that Closet Rod Flanges is the "real" term for pole holes. Who knew!? (and if you already knew this...well, good for you. ha!) 

So I hunted around lowes.com and homedepot.com for (let me be proper) rods and flanges. I found some at both, but homedepot.com prices seem to beat lowes.com, so I bought them there. How nice is the buy online, pick up in store (or OOPUIS to the super cool peeps like me...lol) option!? LOVE IT! I don't have to walk around gathering my supplies, I can just order and pick up.

So here's what all I OOPUIS'ed:
- 1 six foot Closet Rod Pole in Brushed Nickel @ $19.96
- 2 sets of Closet Rod Flanges in Brushed Nickel @ $5.57 each
- 1 set of wall anchors to fit the screws that came with the Flanges

#1- Cut the pole
So if you look at my closet plan (also posted in Post 1 of this series) you'll see I needed 2 rods that were 29.5 inches long each. Since my closet was oddly sized, I had to buy a long pole and then cut to custom length ones rods out of it. We just measured the pole and then marked the spot to be cut with painters tape. My hubs then used the handsaw to cut it at that line. You could use your miter saw to do this if you have the right blade...but I was too cheap to buy a new blade just for this, so I used the cheapest saw I had on hand.

#2- Measure & Mark where the Flanges should go..then screw'em in.
I want the lowest closet rod to be around 41 inches off the ground and the higher one to be at least 82 inches off the ground. First, we measured 41 inches off the ground on one side. Then held one flange in place and marked the holes. Hubs then put anchors in the drywall for the screws. We then screwed in that flange to the wall. To mark the second flange, I taped a level to the pole and inserted it into the flange hole that was already attached to the wall. Then placed the other flange on the pole and moved it up and down the wall until the level said the pole was well....level. lol.

We then used a pencil and marked the appropriate holes on the wall. From there it was just a rinse and repeat....we put drywall anchors in the new marks and then screwed her or him it in. 

#3- Higher Pole
We followed the same strategy with the second and highest pole....only difference was I stood on a chair rather than the ground. ha! You thought it was gonna be some ground breaking new strategy...well, I thought my taping the level to the pole was pretty ground breaking myself.

So here's the closet in all it's poled glory.


Now, I've gotta get my tail in gear and finish this thing. We will have a guest in this room soon and there's lots more to do outside the closet.

To see previous Extra Bedroom Closet Overhaul posts click the links: 
Phase 2- the lights
Phase 3- the poles

Note: I was not given anything in this post. I purchased everything myself and was not compensated to post my opinions about it. I simply listed my supplies purchased with my own monies for the benefit of you, my wonderful reader friends.

Tuesday, June 25, 2013

Extra Bedroom Closet Overhaul: Phase 2- Let there Be Light!

At the very end of my Phase 1 post, I hinted that there might be some issues in my plan for overhauling the extra bedroom closet. The biggest issue was that there was not an overhead light in there....and no outlets to use to hang a pendant or anything.  See how dark it is in this picture I posted a few weeks ago:

I mean what's the point of having a walk-in closet if you walk into darkness. DUH! I would love to at some point have an electrician run a light in there if it can be done. There's a room over this one, so it could be a little tricky I'd think. I dunno...I'm obviously not an electrician, but it seems like it could get hairy. My dad suggested another solution. He suggested I look into motion sensor lighting kinda like outdoor flood lights. He sent me a link to these Mr. Beams from Amazon that get really good ratings.

They were only $19.99, motion sensored, and battery operated. Very cool....very very cool BUT for the OUTSIDE of a house. Not the ceiling of my closet. I mean that thing is CREEPY looking. If I opened the closet door and that thing spot lighted me, I woulda wished I had been wearin' a diaper. I mean not that I generally wish to wear diapers...I'm just sayin the alternative to cleaning up the mess I'd make...well lets just say that diapers would be better. So the search continued...for less alien-like lights and ones that could possibly be attached to the ceiling. I looked on Amazon for more Mr. Beam like lights and what do you know! Mr. Beams makes a ceiling light too! Check it out:


Normal looking- check
Ceiling Mounted- check
Battery Operated- check
Motion Sensored- check

So, I ordered two. I was gonna only order one for $19.99, but you get free shipping on amazon (I don't have prime....I'm too cheap) for orders over $25....so I just ordered two. After they arrived, I installed the batteries and then mounted them on the ceiling using these heavy duty command strips:

After seeing the brightness of them and how the light fell, we mounted both. I figured we could always pull one down since we were mounting them with command strips. Oh and as for the reason we didn't mount them using the included screws and such....well I have drilling-hole-commit-o-phobia. It's a real thing ya'll, look it up. Anyhow, mounting these puppies was easy, peasy with the command strips....once I we finagled the full size 8 foot ladder into the closet. Yes, I know I need a 4 foot ladder....I'm hoping this year's Black Friday Lowes or Home Depot will pull through for me and run one cheap. To determine where they went, we looked back at my original plan (see it HERE), took the length of the closet which was 78 inches, divided by 3 (since we we're mounting 2 lights), and got 26 inches. Then took the width of the closet which was 29.5 inches, divided by 2, and got a little less than 15 inches (ok, we eyeballed this one a little more...lol). So following the instructions of mounting things with command strips, we placed the brackets that hold the lights 26 inches from each side of the closet lengthwise (which meant they are also 26 inches from each other) and a little less than 15 inches from each side width-wise. Make sense? Here's a picture with them on where you can see each of the lights beams.

Made it a lot brighter didn't it!? It's not like having an electrically wired one, but it's not bad at all. It's a nice looking cheap solution, actually. One cool thing is since they are motion-sensored, all I have to do is slide the pocket door open and they turn on! No light switch needed. And since they are ceiling mounted, they look normal... here's a shot of them I took while laying down in the closet:

Oh, you noticed the weird little bracket thingy over the doorway? Yeah...I need to take that down....and paint under it. Rawr. That was for the light the previous owners had installed....it was a battery operated pull chain job. It looked atrocious...and was broke when we bought the house.

Now that it's brighter in there, Sophie likes it. I think she thinks it's her room now.

So now we have light....onto the next phase of the plan. Poles! And ya'll know I love poles!


To see previous Extra Bedroom Closet Overhaul posts click the links: 
Phase 2- the lights

Note: I was not given anything in this post. I purchased everything myself and was not compensated to post my opinions about it. The links to the products I used are Amazon affiliate links. If you buy something after clicking through my post, I may get a small smidge of Amazon credit....which will only encourage me to keep up the posts. Thanks!

Affiliate Links 

Thursday, June 13, 2013

Dining Room Update for instant gratification

Like most DIYers, I always have millions of ideas floating around in my head....that plus a woman at my church declared I have ADD this weekend....so theres that too....actually this someecard describes the sitch in my head at all times:
Ok, anyway back to the story...so I have a lot going on in my mind and WAY more projects I wanna do than I will probably ever have time for..at ANY point in my life. I do make time for some projects, but occasionally I get too many in the hopper and feel overwhelmed. At the moment, I have the closet project, a new Ana White build (that I haven't even posted about yet!), and 2 pieces of artwork....along with you know 50ish hours of "real" work a week and the normal laundry (when its utterly necessary....if you still have 2 pairs of undies then you're good in my book) and normal house work (and mopping every 6 months is the norm, right?)....so sometimes you I just need little updates/projects that provide instant gratification.

SOOOOooo I bought curtains and a curtain rod for my dining room.....the room this bad-to-the-bone blogger hasn't updated you on in  FOR-EV-AH! The last time I showed you the dining room, it looked like this:

Here's it's current state:


sooooooo since the last time I updated you I have gotten:
6 Pottery Barn Seagrass Dining Chairs in Havana Dark- ya'll know I have an unatural addiction to seagrass, right?
by popping by the Pottery Barn Outlet once a week (and sometimes twice a week) on their truck day after work... I scored these 6 beauties (mind you one of them is out of the frame in this pic) for around 350 bones plus tax for all 6! So now we have 8 total dining chairs. The other 2 end chair lovelies I got for $65 each when the outlet had BOGO!

Restoration Hardware Look-Alike Chandy- swoon!!!
Restoration Hardware sells their Rectangle Shade Pendant for $595. Yikes. I LURVE it, but not like sell-a-kidney-on-ebay love it. This pretty lady came from Overstock...Gotta love the O price at $139 after a 20% coupon in my email. At $450 cheaper than the RH version I will definitely take it. This light is almost 4 feet long!!!! Thats a lotta light. I HEART it. And it's on poles....and you guys know how I feel about pole jobs

and last but not least...
I can never decide on curtains. I liked the JCP ones, but they were $100 EACH! what!? no. I will bust out my sewing machine that has been in the box for the 10 years before I will pay $100 each. Then they ran a half off sale and I found a coupon code...so I snatched them up like I was a kid at an easter egg hunt. 
Now other than hanging the rod, there wasn't a whole lot of work involved in this project...but I will share with you my little secret. You know the Target drapery rod I got? Well, it's extendable. Which means it has those little plastic rings at the extension parts like this...
Well, I took a brown Sharpie marker to the rings on my new ORB (shout out to YHL for makin this acronym popular) rod and look how they turned out....
and you can't see them at all when you're standing on the ground (i mean where else would you stand, but you know what I meant.).

So that's my little trick....now I really need to get a silver Sharpie out and do that nickel rod in the pic above this one. Hope my little trick helps someone.

I hope to have a closet update soon. Peace out awesome readers.

PS- please ignor the supa dirty dining room table....it will get cleaned....sometime.
PSS- I purchased all of these items with my own monies...none were given to me or sponsored by anyone.
PSSS- I am trying on new logos on my pics to cut down on them being stolen...it stinks like mustard lookin baby poo when someone claims a room in your house as theirs.


Linking up to: 

Affiliate Links 

Tuesday, June 4, 2013

Extra Bedroom Closet Overhaul: Phase 1- Planning


All of the bedrooms in this house are proud owners of big...REALLY big walk-in closets. I'm not saying that they  are California Closets (are those still in style? I wouldn't know. I am totally not trendy. did they ever become affordable for the common man woman?) Either way, all bedrooms had these huge-mungo (yes, that is totally a word....it's my blog I say it is a word...thank you.) closets with wirey like interiors....all but the extra bedroom downstairs. Yes, it had the builder-ish wire junk, but it was not a walk-in. It was decently sized, but well...it wasn't doing it for me. I mean if you put clothes all the way back on the top and bottom hanging parts then an average sized person (this could be totally wrong...I just couldn't reach them and it's my house so I just consider me average..at 5 ft and 3.75 inches...yes the .75 makes a difference) couldn't reach them. Here's how the situation looked before we moved in:


There was another thing that bugged me. There was a piece of wood on the wall behind the wire closet system. Yes...wood. Wood wasn't used to build the closet system, but apparently was needed to support it when the wires ripped a hole in the wall. 


Well, the wood on the wall was the straw the broke the camels back (thats such an odd quote to me btw). I wanted that wood off the walls...and if the wood was coming off the walls that mean the closet system had to come down with it.....and it wasn't going back up if I could help it. So when we had the house painted (yes, I didn't DIY the paint on my house. Surprised!? Well don't be....it was pretty much not worth it because I have an amazing paint guy named Rony with an amazing paint crew and their prices cannot be beat...and they use QUALITY paint to boot.) anyhow when we had the house painted, we took it all down....and had them fill the hole left behind underneath the wood....and by this time we had had the downstairs bedrooms recarpeted too.So this is what it looked like:


Please pay no attention to the piece of trim in the floor. It's actually a piece of window cornice I stored in there temporarily. But thats how the closet looks these days...like an empty little mini room. And it has stayed that way for 6 months now.....so it was time for a plan of attack. I took the measurements of this room to decide if I could make it into a walk-in....and do it effectively still maximizing space. I think I can, I think I can (said the little engine that could). I then printed out a piece of graph paper from printablepaper.net   and started drawing out my plan. Here it is:


The big drawing on the left hand side is the "aerial" view of the closet...and then the A and B are as if you are standing in front of those sides of the closet. Where you see two lines that is a shelf and where you see a squiggly line that is a clothes bar. Clear as mud? 

I'll update you on this adventure as I go along. Anyone else planning any overhauls soon? Anyone see any flaws in my plan? (Hint: I think there is one...so I am already scheming on how to remedy it) Also, what material would you use for the shelves?

Affiliate Links 

Friday, May 24, 2013

I Like Pole Jobs Better! (Pendant Lights)

I am a big fan of poles....when it comes to pendant lighting that is. What did you think I was talking about? Shame. Now that we have that taken care of I can share with you my latest pole job (I hear you snickering like a 13 year old school girl!). I know the jokes are lame, but it's all good....Honestly, when we were looking at lights I did tell Mr. SS "I think I like pole jobs better".....without even thinking....out loud in the middle of a home improvement store. Yep. I did that.

Ok, so lets get down to business.... this is the pendant situation we had in the kitchen upon moving in.

Two little orangey-yellow glass pendants hanging from the black canopies on the ceiling by black cords. They were okay if thats your thing. Its not my thing. And there were a few reasons that I wanted to change them out:

1. The one of the right had a big crack in the top. If you bumped it, a piece of glass would fall out.
2. They didn't put out a whole lot of light. 
3. I couldn't put an LED or CFL in there without it being seen.

So I started looking at lights mostly to satisfy criteria #2, because I like a lot of light.Then I found these beauties on Pottery Barn's website

(image from HERE)
I had a coupon and then they ran a sale.....and then a pair of them became mine. And they are BEAUTIFUL. WAY WAY nicer in person than this picture even makes them look. I absolutely loved them. I even bought an extra in case we ever broke one. I mean I knew these were gonna be the lights for me, errr I mean our kitchen. We finally got around to putting one up. Around that time, I had heart issues that wouldn't allow me to put my hands over my head for very long....so only that one pendant got put up and we lived with two different pendants in the kitchen for 4 months! Yes, 4 months! Can you believe type-A me let this happen!? The audacity! No, really it was just probably just a lack of time and sleep. 

Either way, those 4 months taught me....those were not the pendants for me either. Obviously if my type-A self can leave two different pendants up and not even be motivated enough to put up the other one, something isn't right. So I studied the Pottery Barn one. 

Did I like the glass? Yes. Beautiful. 
Did I like the metal color? Yep, its a shiny,sparklyish DEEP brown/black.
Did it clean well? Yep, you really didn't notice the dust & such as bad as I thought you would.
Did it have options? Yep, I could use the fad-dish Edison bulbs, colored bulbs, etc
Could I change the length? Yep, a bunch extra length was shoved in the canopy

So studying the fixture itself didn't help. I then started looking at other pendants from various internet sources trying to find a common theme in those I liked.... Thats when I realized I liked poles. Yup, I do. They are thick, sturdy, have a solid appearance in the air, add a visual element, and hang uber straight (if your ceilings are straight). That was the problem....I wanted poles in the kitchen rather than cords! 

So I started searching and wouldn't you know Home Depot came through for me. I found these lights which are made by the Home Depot brand Home Decorators:
(picture from HERE)

We went to the local Home Depot and checked the display out they had of it.
Was it on a pole? Yep
Would it clean well? Yep
Would it match? Yep, looks just like the appliances
Could you change the length? Yep, came with 5 twelve-inchers and 2 six-inchers
Could I use whatever type bulb? Yep, it had a glass diffuser!!!!

So, 2 of them became mine and looky at the pretties in my kitchen:

I love them!!! Loved them so much that we put BOTH pendants up one right after the other. Here's my assessment of them in the 2 weeks we've had them up. First of all, they were probably the easiest lights to install that we've ever done...and I've changed out a lot of lights. Secondly, the pictures do not do them justice. They are GORGEOUS in person. Very industrial yet modern and traditional all at the same time. The only slightly negative thing I have to say is that once hung, the diffusers are hard to get on. Not impossible, but just not easy, peasy....but since I put CFL's in them I won't have to open the diffuser but every few years or so. Lastly, they put off a soft, bright light that is perfect for kitchen pendants.The lights themselves are not on in this picture....why?? I have no clue...I just took it because I was so happy to love them.

btw...I am not sponsored by Home Depot. I was not given these by Home Depot. Home Depot has no clue at all that Simply Sarah even exists....I was just excited about my lights. BUT Home Depot if you read this and want to see more of your goodies featured here....well, I would not be opposed to this! ha! :)

Affiliate Links 

Monday, March 25, 2013

Martha Stewart and Holes (Family Tree Artwork)

Until Martha Stewart went to jail, she was my home decor hero. After she went to jail, I no longer had a sliver of respect for her who am I kidding she's still fabulous when it comes to the home front. She does need to stay out of the finance side of things and avoid insider trading and all other illegal activity, but other than that she's golden. I mean when people say the name Martha Stewart they think about trading pillows not trading stock, so I think she's done a good job in repairing her damaged reputation. I mean she had a pretty big hole to fill, and she inspired me to fill a big hole of my own. (That was a pretty nice transition from Martha to holes, wasn't it!?)

Remember, the big hole in the entry way wall? I think it's made to hang a fancy picture. It also has an outlet in the middle of the hole so that you can illuminate said fancy picture with it's own light. There's even a separate wall switch for that outlet. You can see the fancy picture hole with the outlet on the left hand side of the picture below. 


When we were having the house painted, the original plan was to fill this hole in with drywall. Then I was gonna hang my big Pottery Barn Inspired Numbers Artwork there. The fancy picture hole is 4 foot by 4 foot, 1 inch (yes, they never get it just right do they?) and my painting is 4 feet wide, so it didn't look right inside the hole. Then when it came time to actually filling in the hole, I chickened. My lovely mother-in-law had been telling me all along, "I would NEVER fill that in. I would put a mirror in it with a little table in front of that with flowers on it." Well, I already had a table and flowers in the entryway....and I am too cheap to change the table and too sentimental to change the flowers (they're our wedding centerpiece). But apparently her words about filling in the hole did stick and I couldn't do it. I listened and left the hole. Now I had to fill it.

Then a few weeks ago, my DIY bestie, Gabby and I paid the local Habitat to Humanity ReStore a visit. We found a Lenny's Sub Shop sign, lots of hazmat suits, some church columns, a lot of dirty commodes (If you're not  from the South, a commode is a toilet) and a Red Lobster fisherman. Yes, a life size fisherman and he's creepy and pretty dirty considering when you remove the fisherman's net then he has his hands in a sexual position. It's wrong on so many levels, but true. The ReStore, however, rocks and we will totally be visiting there every chance we get. We did find this beauty in there along with the dirty fisherman.
(apologies for the bad pic...I got lazy, took this at night, and didn't care enough to photoshop.)

A 3 foot by 3 foot  picture with a great frame and a neutral matting. Check out the original price tag.
(again apologies for the bad pic...I got lazy, took this at night & upside down, and didn't care enough to photoshop.)

Crazy price, huh!? Real smart people pay that price too. I paid $25. The actual picture itself did not matter, because I was gonna do away with it anyhow. I like my artwork to mean something and to be made by me (generally). So this is where Martha comes back in the picture. On Martha Stewart Living, I had seen an idea and template for a family tree. I took this idea and came up with my own family tree in photoshop. Here's a close up of how it turned out:

The middle circle is me and the hubs. The second circle is our parents. The third ring is our grandparents. The fourth circle is our great-grandparents. The fifth is our great-great grandparents, and the sixth is our great-great-great grandparents. Husbands and Wives have a dotted line between them. I think it's groovy, ingenious, and no one can have one just like mine. 

Here's a few details of where and how everything came into being:
- The frame is from ReStore for $25.
- I made the family tree in photoshop.   
- Staples printed it as a 2 foot by 2 foot engineering print that cost by $3.59 tax and all.
- I filled in a few scratches on the frame with a brown crayon and you'd never know unless you read it here.

And here's a look at my entryway with my fancy picture hole filled with artwork inspired by Martha. 

I also gotta give a shout out to my hubs for his mad picture hangin' skillz. How center is that square inside a sqaure!? Also this thing isn't moving. It's probably about 30 lbs, but is hanging on two 50 lb mirror hangers that are both in studs. I could swing from it.....well, not really. I am over 100 lbs, but you get the point.

TUESDAY LINKY PARTIES

Affiliate Links 

Monday, February 25, 2013

Christmas in February!

For Christmas my parents gave us a gift certificate to Pottery Barn. They gave it to us with the intentions of us buying chairs for the dining room. I kinda ruined that plan....oops!. More to come on that later, but I am sorry 'bout that mom!!! Anyhow, Pottery Barn definitely gets loads of flattery from me in the form of imitation. I LOVE me some Pottery Barn. But I also love to take ideas and concepts from their catalogs and change them up. Make them my own. Put my own spin on it.....ok, ok you get the point. I like to be Sarah plain and simple, but with some unique twists thrown in. Kinda like the HOME sign I made that was inspired by Pottery Barn. But some Pottery Barn things just can't be made by me, so I am always stalking their outlet stores for the next treasure to take home. 

Well, DH & I happened to drop by the other night and low and behold we found a bargain! Remember, I posted during our 3 month progress & when we were hiding blue holes I posted the following picture of only 2 barstools.

Well, obviously that bar is made for 3 barstools, but I've just been too cheap to buy them all at once. I've been patiently impatiently waiting for them to come into the outlet store. And BAM, the other night they had one marked almost 67% off and you got an extra 15% off one item for their President's Day sale!! That made it almost 73% off. AND we had that gift certificate from my parents!!! WHOO-hoo! Christmas in February, people! We swiped it up and then crammed it into the backseat of the car.  And we didn't even use 1/4 of the gift certificate to buy it! 


It's crazy how much better 3 looks than 2. Or maybe I am just so thrilled to have picked up all 3 barstools for the price of 1!!

Affiliate Links