There's one big huge wall in my living room. Our house has a really open floor plan, so theres not many big walls but the living room does have this one very nice large wall. When DH and I got married, he had a framed deer picture hanging on that wall. It was a decent picture...for a bachelor's living room. I left it for a few years and then replaced it with a larger framed abstract picture. That abstract picture stayed another few years, but it never seemed right. Well, over the course of the last year, we have actually been trying to make this house we live our home. And by that I mean, we have given DH's parents back the furniture they handed down to him when he bought the house and we have slowly been adding pieces that are more us. It's taken us a while to do this (5 years to be exact...yes, our 5 year anniversary is only a month away!) for a couple reasons. One, because we weren't sure what we liked and two, because we were waiting to find just the right pieces at a price we were willing to pay. God was faithful as always and led us to just the furniture for us...and at the right price, of course. That big wall, however, remained blank.
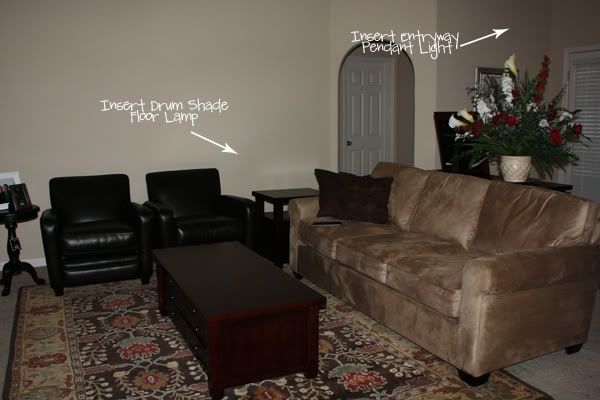
Remember back in June I posted (HERE) this picture which showed the new furniture that God had led us to, and also showed that big blank wall.
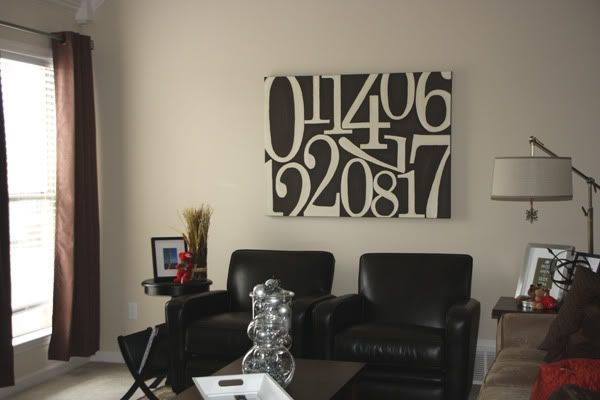
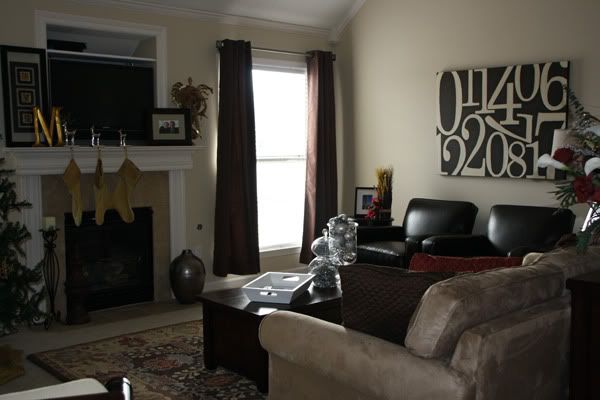
Well that big blank wall actually stayed a big blank wall until TODAY. Today, I hung up my latest project on that very big blank wall. YAY!!! Check it out hanging in my living room!
My inspiration for this project was this Pottery Barn Numbers Canvas.
I loved the oversized, uneven numbers on that large canvas. I could envision that on my big huge blank wall. But there were a couple things I didn't like about it too.
#1- The price. I think it originally sold for $299. Yowza that's steep! It is now unavailable for purchase, however.
#2- It was printed not painted. Also, it was printed on an unstretched canvas, so it wouldn't add any depth to the wall.
#3- The numbers on that canvas meant nothing to me. Why hang something on the wall that means absolutely nothing to me?
So I decided to make my own.
Here are the steps I took to make my own:
#1. Bought the Supplies:
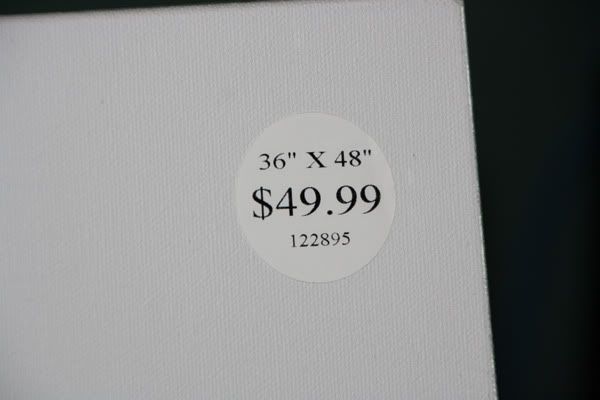
- Canvas: I used a 48"x36"x2" Master Art Canvas (from Hobby Lobby- Reg. $49.99 on sale for $25)
- 3 Tubes of BASICS Acrylic Paint : in White, Raw Umber, & Bleached Titanium ($2-4 each at Michaels w/ 40% coupon)
#2. Decide on the Design
I knew I like the typesetter font that Pottery Barn used on their canvas, so I searched out a font I like that looked like that one PB used. I settled on the Century Schoolbook font.
Now what numbers did I end up using?? Our full anniversary (month, day, and year) and then both of our birthdays (month and day, only).
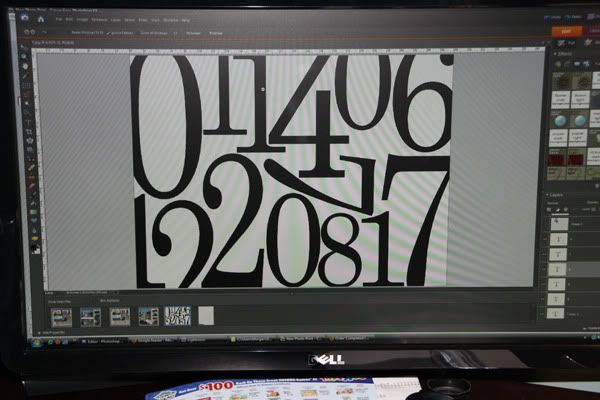
With my font and numbers chosen, I opened up Photoshop Elements(PSE) to begin my design. In PSE, I clicked File>New>Blank File> and then set my width at 48 inches and my height at 36 inches (the size of my canvas) and clicked OK. I then typed my chosen numbers out separately, so they could be arranged individually. I then resized and moved them around until I was happy with the results.
#3. Arrange the Design on the Canvas
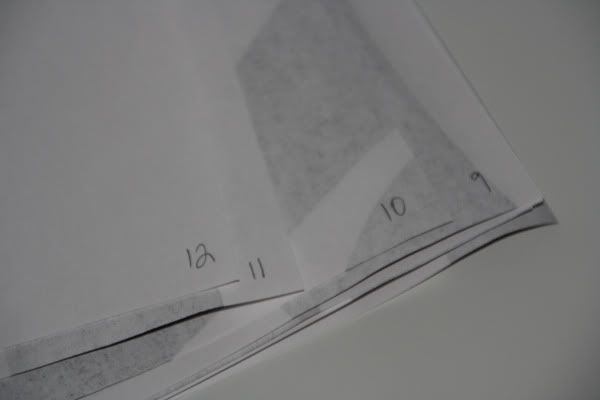
I printed out my design to use as a guide for my canvas. After printing out an overall version, I cropped my picture in PSE into a bunch of pieces so that I could print the whole thing out lifesized....of course that took about 25 sheets of paper. But I also knew I could never make my numbers look like those typesetter numbers if I didn't have something to copy. I then took those cropped, printed pieces and arranged them on my canvas.
I didn't want the pieces to get all mixed up once I had them all laid out, so I number the backs of each piece. I made sure to number the same corner on each piece so I would know how it should be turned.
#4. Copy the numbers onto the Canvas
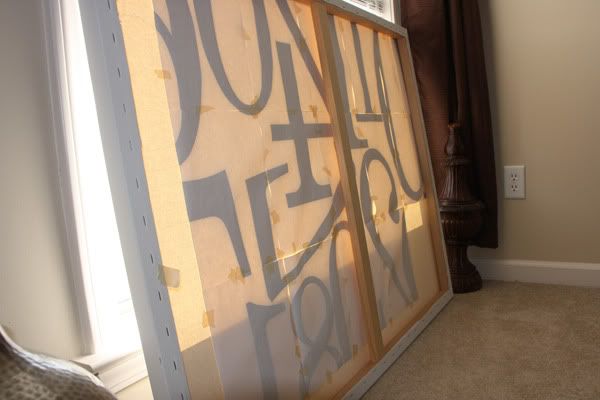
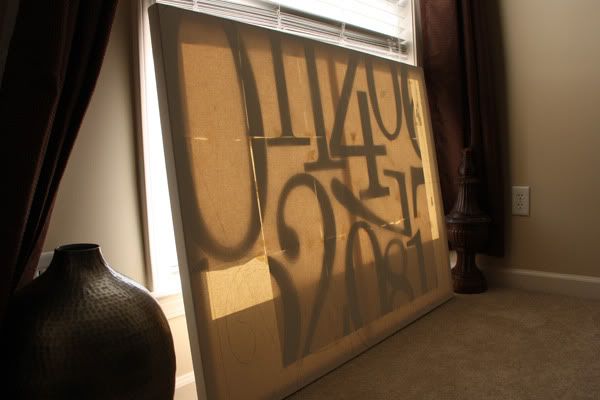
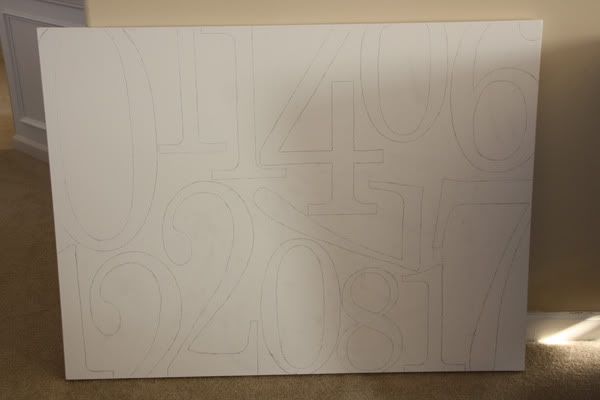
I wanted to pencil the numbers onto the canvas before painting them because I really wanted them to have that typesetter look. So on a sunny Saturday, I put it in front of a windowand taped each of the separate pieces to the back of the canvas .
When I flipped the canvas over, you could see the dark numbers. I then traced the outlines of the numbers onto the front of the canvas with a pencil.
#5. Paint the numbers on the Canvas
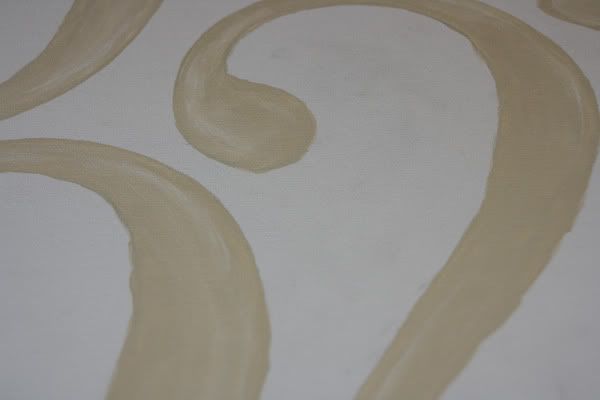
Using the .5 inch flat wash brush and the bleached titanium, I patiently filled in the numbers.
Here's the painting technique I used:
For each number, I filled it in solidly with the bleached titanium. Then as soon as I finished each number I would dab the tip of the brush in white just a little and randomly smear in a little white here and there into the number where I thought there would be highlights if the number was 3D. Here's a closeup of just the numbers.
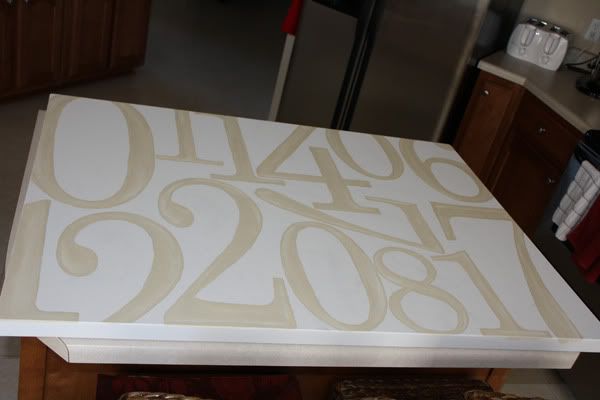
Here's the canvas after I finished all the numbers.
#6. Paint the Background
Even though the PB version has a black, crackly background I decided mine should be a dark brown to match the living room. So I used the raw umber color I mentioned above. To fill it in, I use the .5 inche flat wash brush again to fill in the areas around the numbers. I would solidly fill in a small/medium sized section with the raw umber. Then I would dab the corner of my brush just a little into the bleached titanium color and smear just a little into the area I had just painted with the raw umber. This keeps the color from looking flat.
#7. Paint the Sides
Since I had used a 2 inch deep gallery canvas, I had to paint the sides. Now a lot of people like whatever is painted on the face of the canvas to be continued onto the sides. I decided that that would make it look to busy and not really make it "pop" off the wall. So I decided to paint the sides Raw Umber only. I waited until the face of the painting was completely dry to start the sides. I didn't really use a technique on the sides, I just solidly filled them in. I used some painting tape around the edges of the top to keep from getting it onto the face of painting.
And here's a closeup of the finished product
And just so you don't have to scroll up here it is in my living room one more time.
I think it looks fabulous if I can say so myself. I love it. It's perfect for that big wall. And it cost me less than $50! That's like a $250 savings over the PB version. Of course, making the numbers our numbers rather than PBs chosen numbers is well, priceless (as they would say in the credit card commercials).
Thanks for looking. Hopefully this will inspire you to start a project of your own.
Click HERE to see the linky parties I'm linking this project to.
Click HERE to see the linky parties I'm linking this project to.
Also linking to...
Affiliate Links








Ohhhhh, is veri nice!!!!
ReplyDeleteMe encanta! es muy bonito,gracias por compartir,
Saludos,Eli
I so want to do this, but have no wall space right now. I love this look and it looks great in your space. Terry
ReplyDeleteHi! I came over from a Christmas party and this is amazing! I am saving this post for the future. Great work!
ReplyDeleteAbby
Looks amazing! You are so talented!
ReplyDeleteYou did a great job! I might attempt this myself for my living room. Thanks for the inspiration!
ReplyDeleteYou did a beautiful job!! Creative way to figure out how to get it done!
ReplyDeleteI absolutely LOVE this! and so personal! I would love to do something like this. That project would take me forever! What a perfect wall you have to put it on!
ReplyDeleteThis is amazing! And I love it much more than the original!
ReplyDeleteMelissa
http://www.burstsofcreativity.blogspot.com/
I love this!!! Must share on my FB page!!
ReplyDeletethis is gorge!! great job =)
ReplyDeletewww.bargaincornerdesigns.blogspot.com
This looks AMAZING in your lovely living room~ you are really clever and creative! Hopped over from Boardwalk Bragfest...I am a new follower!
ReplyDeleteLove it, you did an awesome job! It's perfect for your wall.
ReplyDeleteLeAnn
Absolutely beautiful! God has blessed you with so much talent. I am proud to be your Mom.
ReplyDeleteYou've done an amazing job!!! It is so beautiful!!! and so perfect for a young couple!!!
ReplyDeleteApplause!!!
Wonderful addition to your wall!
ReplyDeleteWow Sarah! I am so impressed. You did a great job. I LOVE that you used significant numbers.
ReplyDeleteYou did a fantastic job, I'm totally inspired :+)
ReplyDeletegorgeous! I wish I was more confident in my painting skills to try something like this!
ReplyDeleteThat's fabulous - I thought your photograph was from the PB catalog! You must be so proud - <3 it!
ReplyDeleteThere's nothing simple about you Sarah...that is beautiful art work!
ReplyDeleteLOVE LOVE LOVE. Hat's Off! Great project, great results!!
ReplyDeleteJeanne.http://imsimplysarah.blogspot.com/2010/12/pottery-barn-inspired-our-numbers.html
oops, meant to put in my blog, I came over from the Coast Charm linky. So glad i did!
ReplyDeleteJeanne.
http://beeskneesbungalow.blogspot.com/
OH!!! It is SOOOOOO GOOOOOD!!!! I actually like it much better than the PB one! Way to go!!
ReplyDeleteI LOVE this! I saw another tutorial for this on wood. Your tutorial is great because you go into much detail. I love that you've helped me doing the photoshop, and again how to trace the letters. The other tutorial used cut out vinyl letters, and I don't have access to that. BRAVO! I'll be bookmarking this to do in the future!
ReplyDeleteWow! This is an amazing project!!! I love it!!!
ReplyDeleteThis is AWESOME! I love that you used numbers that mean something to you. Really awesome project! Your room looks great!
ReplyDeleteBeautiful.
ReplyDeleteThanks for linking this up to Fantastic Friday. I hope you will come back and join us again this week!
ReplyDeleteJust popped over from YHL and have to say this project is awesome! Thanks for sharing your talent and all the details of how you did it!
ReplyDeleteI just found your post (and blog) and I wanted to tell you that you are a genius. I kept thinking I needed a projector but your sunlight through the canvas is absolutely genius! And your Pottery Barn knock off looks amazing! Great job!
ReplyDeleteThank you so much for this! I found it on pinterest and I have already started on this project as of last night. So far, I have printed and taped my numbers together. I have yet to get the canvas and paint supplies. Once finished, I very well may post it on pinterest and give credit where credit is due! Many thanks for the inspiration and an inspirational piece. God bless and Happy New Year!
ReplyDeleteGreat idea to decor house with art on canvas. Your art and photo selection is great. I like your describing way. Consider cheap canvas printing online store “Canvas Dezign” and go with their price list. You will get order and amazed with their canvas quality.
ReplyDelete