Showing posts with label cooking. Show all posts

Saturday, May 28, 2022

Recipe: Oreo Truffles

This recipe makes THE BEST Oreo Truffles! Try it and I’m sure you’ll agree!

Ingredients
8 oz. of Cream Cheese, softened
1 regular size package of Oreos (I like double stuffed ones)
1/2 tsp of vanilla (you could use other extracts also, but I like vanilla)
1/2 lb of semi-sweet chocolate morsels (I like Nestle Semi-Sweet Morsels)
1/2 lb of white chocolate morsels (I like Nestle Premier White Morsels)

Instructions
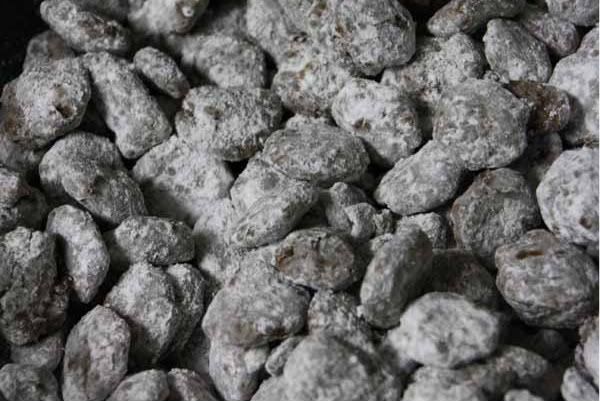
1. Crush Oreos into a fine powder. I used my blender (because at the time I didn't have a food processor...as of Christmas though now I do. Thanks mom!) and just did 6-8 cookies at a time on the ice crush function. Then I'd pour out the cookie powder into my mixers bowl and let the blender crush another 6-8 cookies. (If you don't have a blender or a food processor then I'd put the cookies in a gallon size plastic bag and roll over them with a rolling pin or a large can.) Pour all cookie powder into a bowl for mixing.
2. Mix cookie powder, vanilla, and cream cheese until well blended. You should see no traces of white anymore really. I use my stand mixer to do the blending work for me, because it's a really thick mixture and wears my arm out stirring.
3. Scoop using a small cookie scoop or pinch out tablespoonish (yes, I'm making up words...lol) amounts of the cookie mixture and roll into small balls. I personally use the pinch method because that's quicker and uses less dishes. Place the formed balls on a cookie sheet covered in wax or parchment paper. After finishing forming all the balls, place cookie sheet into the refrigerator for at least 1 hour before proceeding on to the next step. This keeps the balls from losing their shape when you dip them in chocolate.
4. Melt 3/4 of the semi-sweet chocolate morsels by warming them in the microwave for about a minute. Stir and place back in the microwave at 15 minute intervals until chocolate thins. (If you don't feel your chocolate has thinned well enough, you can add a 1/2 Tbsp of Crisco and it should help thin it a bit.) Remove your formed balls from the refrigerator. Dip half of them into the melted semi-sweet chocolate and place them back on the covered cookie sheet. Repeat Step #4 with the White Morsels and the other half of your formed balls.
5. Melt the remaining 1/4 of the semi-sweet chocolate. Using a fork that's been generously dipped into the melted chocolate, make a sweeping motion over the white chocolate covered balls to make dark "stripes". Then, melt the remaining 1/4 of the white chocolate. Using a fork that's been generously dipped into the melted chocolate, make a sweeping motion over the semi-sweet chocolate covered balls to make white "stripes". 
6. Store in the fridge. Remove an hour or so before serving.

Makes 40-50 truffles depending on the size of the balls you roll.

Affiliate Links 

Friday, July 6, 2012

Philly Turkey Burgers

With the temperatures hitting 100 or more everyday, I have been looking for new dinners that won't heat up the kitchen and house. When you eat a cold sandwich or salad for lunch though, you don't want it again for dinner. Also, I try (notice the word try...lol) to make our dinners fairly healthy. So here's what I came up for dinner one night this week and it was fabulous... Philly Turkey Burger. I already had all the ingredients on hand and hopefully you will too.


Ingredients:
1 cup Sliced Peppers and Onions (I used the frozen variety)
4 slices of Cheese (I used White American)
4 Buns 
4 Turkey Patties (I used Jennie-O 1/4 lb All Natural Frozen)
2 Tbsp of oil (I used Vegetable Oil)
Cooking Spray
Salt and Pepper, optional


Instructions:
1. Preheat Grill or Grill Pan that has been lightly sprayed with nonstick grilling spray
2. Preheat Saute Pan or Skillet over Med-High heat.
3. After pan has heated, add oil to the pan. Keep at Med-High heat. Oil will shimmer when it's ready. 
4. After grill or grill pan is heated (I use a Breville Indoor Grill set to 375 degrees for turkey burgers), place the patties on the grill. Grill each side for 5 minutes until they are 165 degrees .
5. When the oil is ready, add vegetables to the pan. Stir or toss the veggies constantly as they cook. After the vegetables soften and just begin to brown, they are ready. Usually this can be anywhere from 6-10 minutes. Mine took about 10 minutes because I started with frozen.
6. Spray the tops and insides of your buns with Pam Butter spray. Then toast in the toaster and remove to a plate. This will help the buns be able to hold the thick, juicy veggies that will top this burger.
7. Place a patty on each of the bun bottoms, top each patty with 1/4 cup of your sauted veggies, Season to taste,  top the veggies with 1 slice of cheese each, and then top with a bun top. If you're feeling particularly bad, you can smear a bit of mayo on the bun before you top the burger. 

Makes 4 Servings

These were SOOO good. The hubby usually balks at burgers made from turkey, but he actually liked these. So to recap... they didn't heat up the kitchen, they were quick, they were tasty, they were relatively healthy, cheap to make, easy to make, the hubs liked them...so these will definitely be made in our house again.

Grab the Printable Recipe HERE.

Affiliate Links 

Thursday, July 5, 2012

Ah-MAY-zing Peanut Butter Cookies using Homemade Peanut Butter


So I have kevinandamanda.com in my google reader and towards the end of April, Amanda posted a recipe for Peanut Butter Cookies that piqued my interest. The key to her recipe is that she used homemade peanut butter. My first thought was "Homemade peanut butter? but why when Jif is so good?" But then she had to go and reference Jif in that very post. Now nothing can replace Jif in my heart, but this homemade peanut butter business made me curious. So I made her recipe...homemade peanut butter and all...and yowzers they were fabulous! I gave some to friends and family and have gotten requests for them again already.

You can see in my picture above, I had already started processing my peanuts when I took the pic of all my ingredients. But if you need more pics, Amanda has more of her process on her blog. I have a small food processor so I did about half the jar of peanuts at a time.
Below is the exact list of ingredients and directions straight from Amanda. My notes are in red.

1 (16 oz) can honey roasted peanuts
1/2 cup (1 stick) butter, softened
1 cup sugar
1 cup brown sugar, packed
2 eggs
1 whole tablespoon vanilla
2 1/2 cups flour
1 tsp baking soda
1 tsp baking powder
1/2 tsp salt
1/3 cup sugar + a dash of cinnamon for rolling

1. Preheat oven to 350 degrees F. Add the peanuts to the workbowl of a food processor and process for 4 minutes until smooth. Add salt to taste if desired. (I did not add salt.)
2. Beat butter, sugars, and 1 cup of homemade peanut butter on medium-high speed for 3 minutes. Add eggs and vanilla and mix on medium speed for 2 minutes. Whisk together flour, baking soda, baking powder, and salt then add to wet ingredients and mix on low speed until just combined. (I used my KitchenAid to do all the mixing work for me.)
3. Using a medium cookie scoop (I use the OXO medium scoop), scoop dough into balls, roll in cinnamon sugar and use a fork to press flat (I just patted them once with a meat tenderizer like she did....very cute and clever).  Bake at 350 for 10 minutes until edges just start to turn golden. (I baked on Silpat baking mats with my Bakers Half Sheets and they turned out a nice chewy cookie. My cookies needed 11 minutes before the edges started browning.) These made 3 Dozen + 9 Cookies for me using the medium scoop.

I will leave you with a few last shots of these glorious bits of baked goodness!


Make them! You won't regret it. :)

Affiliate Links 

Sunday, July 1, 2012

Homemade Oatmeal Cream Pies


These are probably my all-time favorite cookie. I like the Little Debbie version alright, but this...this is something special. I could keep eating these tasty treats.

Ingredients:
2 cups of Brown Sugar (I used 1 light, 1 dark brown)
1 stick of Butter (1/2 cup)
1/4 cup of Crisco
1/4 tsp of vanilla
2 Eggs
2 1/2 tsps of Cinnamon
1 tsp baking soda
1 tsp of baking powder
2 1/2 cups of Flour
2 Cups of Quick Oats
1/2 tsp of salt
3 1/2 Tbsps of Water
18 oz Jar of Marshmellow Cream

Instructions:
1. Cream butter, Crisco, and sugar in mixer on medium speed for 3-4 minutes. I use a Kitchenaid Professional 5 Quart Mixer with the bowl lift. LOVE IT!
2. Add vanilla, eggs, salt, cinnamon, baking powder and mix. I start out at a low speed for 1 minute and then medium for 2 minutes.
3. In a small microwavable bowl, add 3 1/2 Tbsps of water and 1 tsp of baking soda and microwave til boiling which was about 45 seconds for me. Pour over your mixture and mix again at medium speed.
4. Add oats and flour and mix well. This dough will be pretty thick. I used my Kitchen-Aid and it worked, but it complained to me towards the end about being tired.
5. Preheat oven to 350 degrees Fahrenheit.
6. Scoop dough onto cookie sheets. I use a cookie scoop to do this. Makes quick, clean, and easy work of dropping cookies. The scoop I used for these was the OXO Medium Cookie Scoop which makes a 1 1/2 Tbsp ball. For baked goods, I always use a Nordic Ware Bakers Half Sheets lined with Silpat Bakers Half Sheet Nonstick Liners. I can fit 12 cookies using medium scoop on each of these and they bake perfectly.

7. Bake each pan of cookies for 10 1/2 minutes or just til the edges start to brown. Let them sit on the pan for 1 minute after removing the pan from oven and then remove to cooling racks.
8. When serving, place a dollop of Marshmellow Cream on top of each cookie and then top with another cookie right before serving (and after cooling). I don't top with cream in advance because the the cream will ooze right off these glorious cookies.

Makes: 36 cookies or 18 Pies

You can print the recipe HERE.

Affiliate Links 

Wednesday, January 19, 2011

Recipes: JP's Chili Cheese Wheels

A friend at work, JP, shared this SCRUMPTIOUS recipe with me. Actually, she brought these wonderful delights into work the week before Christmas and they were gone in a flash. I've since made 2 batches for a church function. These would be the PERFECT gameday finger food too!
JP's Chili Cheese Wheels
Ingredients:
2 packages of crescent rolls
1 8oz package of Neufchâtel cheese, softened (or 2 pkgs of Cream Cheese)
2 small cans of chopped green chilis
1 small can of chopped black olives (I was out so mine didnt have these)
1 cup of shredded sharp cheddar cheese
1 package of Taco Seasoning
Optional: 1-2 tablespoons of Tabasco/Hot sauce to taste (I didn't have this so I just use Hot Taco Seasoning.)

Instructions:

1. Roll out each crescent roll package into the shape of a rectangle. They should come out the package like this, but they will have perforated seams. Either pinch the seams together until the rectangle is solid or use a rolling pin. (I would suggest rolling these out onto wax paper.)
2. Mix Neufchâtel Cheese, taco seasoning, and Hot Sauce (if desired) til well blended.
3. Stir green chilis and black olives into cheese mixture.
4. Spread the cheese mixture onto the crescent roll rectangles, half on each.
5. Sprinkle shredded cheese evenly onto each rectangle.
6. Starting with the longest edge of each rectangle and roll up to form 2 logs.  
7. Refrigerate for 1 hour or Freeze for 15 minutes. (Make it easier to slice the wheels.)
8. Remove from the freezer. Slice each log into half inch size wheels and place on baking sheet.
 9. Bake at 350 degrees F for about 10 minutes or until golden brown.
(Warning: these are addictive!)

Affiliate Links 

Thursday, December 30, 2010

Recipes: Red Velvet Brownies

After seeing the Red Velvet Brownies from the December issue of Southern Living, I decided I needed to make my own for a family Christmas gathering. Their original recipe and instructions is HERE. Below is how I very,very slightly modified the ingredients and my pictures of how nicely they turned out.

(i know this is a horrible picture of my ingredients, but its the only one I took....so we deal with it...lol)
Brownies Ingredients:
4 oz. bittersweet baking chocolate (I used a Ghiradhelli bar)
3/4 cup of salted butter, plus 1 Tbsp of softened butter to grease pan
1 tsp of baking powder
1 tsp of vanilla
2 cups of sugar
4 large eggs
1.5 cups of flour
1 oz. red food coloring (or other holiday/team color, if desired)

Small-Batch Cream Cheese Frosting Ingredients:
a little less than 8 oz of cream cheese or neufchatel cheese
1 tsp vanilla
3 Tbsp softened, salted butter (or add a little a pinch of salt if unsalted)
2 cups powdered sugar
Colored Sprinkles to match holiday, if desired (I used green and red sprinkles for Christmas)

Brownies Instructions:
1. Preheat oven to 350°. Line bottom and sides of a 9-inch square pan (I used a glass pan and it seemed to cook the brownies just a bit faster) with aluminum foil, allowing 2 to 3 inches to extend over sides as handles; lightly grease foil with softened butter.
2. Microwave chocolate and butter in a large microwave-safe bowl at HIGH 1 1/2 to 2 minutes or until melted and smooth, stirring at 30-second intervals. Whisk in sugar. Add eggs, 1 at a time, whisking just until blended after each addition. Gently stir in flour, baking powder, food coloring and vanilla.  Pour mixture into prepared pan.
3. Bake at 350° for 40 minutes or until a wooden pick inserted in center comes out with a few moist crumbs. Cool completely on a wire rack for 30 minutes, then in refrigerator for 30 minutes.
4. Lift brownies from pan, using foil sides as handles; gently remove foil. Spread Small-Batch Cream Cheese Frosting on top of brownies, Top with Sprinkles if desired, and cut into 16 squares. 

Small-Batch Cream Cheese Frosting Instructions:
Beat cream cheese, vanilla, and butter at medium speed until creamy. Gradually add powdered sugar, beating on low speed until blended.Refrigerate until brownies are cooled and ready to be iced.


These turned out beautifully and were scrumptious. I would also make these using different colors of food coloring and sprinkles for various other occasions and holidays. Think green for Saint Patty's Day with green sprinkles, Red with Blue Sprinkles for 4th of July, etc. Let me know if you try this with any different color combos! I'd love to see how they turn out.

Affiliate Links 

Tuesday, December 21, 2010

Recipe: Puppy Chow, Reindeer Chow, Good Stuff...

So I've heard this dessert/snack stuff called so many different things- Puppy Chow, Reindeer Chow, Good Stuff, and on the list goes. Around here, I've always called it Puppy Chow.  
(Warning: This is SO yummy, but for human consumption only. While it may be called Puppy Chow, it is not for puppies or any other animals. It contains chocolate which can be lethal when consumed by canines. It is so good, though, you wouldn't wanna share any with your furry friend anyway....unless you just happened to have a furry human friend.)

Puppy Chow
Ingredients
5 cups of Crispix Cereal (you can also use Chex, but I like Crispix better)
1 cup of Peanut Butter (I like Jif)
12 oz. of Semi-Sweet Chocolate Morsels (I like Nestle)
1 lb. (about 4 cups) Powdered Sugar

Instructions
1. Measure out 5 cups of Crispix into a large bowl with a lid.
2. In a medium size bowl, melt the chocolate morsels by placing in the microwave for 1 minute to 1 minute and 15 seconds on high. Morsels may still retain shape at this point, but will melt upon contact.
3. Scoop out 1 cup of peanut butter into a small container. Place this container of PB in the microwave for 20-30 seconds or until liquidy. 
4. Pour liquid peanut butter into the melted chocolate and stir until well blended. 
5. Place PB/Chocolate Mixture back into for about 20 seconds, stir, and then quickly pour over the Crispix.
6. Stir chocolate until the Crispix are completely coated.
7. Pour powdered sugar onto the Crispix, place your lid on the bowl, and shake until thoroughly coated.
8. Let cool, pour over into a clean container or serving dish, and Enjoy!


Affiliate Links 

Tuesday, November 2, 2010

Recipe: Sarah's Sweet Banana Muffins


This weekend, I was at the grocery and they had bags of ripe bananas on sale for $1.00 a bag. I needed a few bananas anyway, so I bought a bag. So what should I do with the rest of them. Banana bread? Nope, bakes for waaaaaay too long for me. And then I thought of my favorite banana flavored item.... Muffins. Royal Caribbean has different breads every night of your cruise and my favorites is the sweet banana muffin. So with this recipe I kinda tried to recreate that...

SARAH'S SWEET BANANA MUFFINS
INGREDIENTS:
3 Ripe Bananas
6 Tbsp of Butter (softened)
2 Tbsp of Shortening
2 Large Eggs
1 Cup and 1 Tbsp of Sugar
1 heaping Tbsp of Baking Powder
2 and 1/2 Cups of Flour
1 and 1/2 tsp of Cinnamon
1 tsp of Vanilla
1/2 tsp of Salt
1/2 tsp of Baking Soda
a little less than 1 cup of Milk mixed with a few Tbsp of White Vinegar (or 1 cup of Buttermilk)
(Optional: You could add 1/4 to 1/2 cup of walnuts, but I'm not a big fan of nuts in my food...so I left that out.) 

Yields: 18 Muffins

DIRECTIONS:
#1. Preheat the oven to 400 Degrees Fahrenheit (I know my pic above shows 375, but I changed my mind after I took the pic of the ingredients and decided it should be at about 400.)
#2. If you're using Milk and Vinegar as a substitute for Buttermilk (like me because I NEVER have buttermilk) then go ahead and pour almost a cup of Milk and then add in Vinegar until it reaches the 1 cup mark. Mix it a little. If using buttermilk, move on to step #3.
#3. In a large bowl, beat the Butter, Shortening, Sugar, and Cinnamon until well blended. 
#4. Add your eggs into the mixture and beat.
#5. Mash your bananas (I squished them with my clean hands) and work them into the mixture.
#6. Pour in your Milk/Vinegar Blend and your vanilla and stir until blended. 
#7. In another large bowl, mix flour, baking powder, and baking soda until blended (I used my pastry blender to mix it all around).
#8. Pour the liquidy mixture onto the flour mixture and stir until blended. 
#9. Spray, Grease, or Line Muffin pans.
#10. Pour Mixture into the pans. I used the 1/4 measuring cup and average size muffin pans and they came out perfectly sized.
#11. Bake for 17 minutes or until inserted toothpick comes out clean.
 You can see the little hunks of yummy banana in them! YUMMMMM!!!
These are YUMMY for breakfast, snack, dessert...or just because! ENJOY! Happy Baking!

Monday, September 20, 2010

Recipe: Homemade Gourmet Pizzas

We love love love Freschetta frozen pizzas. When I could get them on a good sale, I used to stockup. It was much cheaper than buying takeout pizzas or delivery pizzas, and tasted great too.  It was definitely cheaper than going to a local pizzeria. One day, though, I decided to make my own pizza. I've often had "casserole" dish pizza from home which IMO doesn't taste anything like delivery pizza...and only leaves you wanting "someone else's" pizza. I wanted something that would make my house smell like a pizzeria....and my taste buds to wonder whether I had gone to a sit down gourmet pizza restaurant. Well, I think I've finally made the homemade pizzas that have made us never eat pizza out ever again.So without furthur ado.... THE Pizza. :)

The Dough Recipe:
1 and 1/2 cup of hot water
1 Tbsp of yeast
1 Tbsp of Honey
1 Tbsp of Sugar
1/4 cup of EVOO (extra virgin olive oil)
4 and 3/4 cup of flour

Instructions:
#1- Preheat the oven to 475F.
#2-In a bowl (or your stand mixers mixing bowl), mix the water, sugar, honey, and yeast.
#3- Let that mix for a few minutes.
#4- Mix in the rest of the ingredients. (If you're using a stand mixer, I'd suggest smearing a little olive oil onto your dough hook before adding the rest of the ingredients.) 
#5- Mix together until blended and forms a slightly sticky ball of dough. (I know. I'm very technical. *wink*)
#6- Let you dough sit. Below is a pic of my big lump of dough while it's sitting on my cooktop rising. I leave it sitting there in the open because I don't like my dough to rise too terribly much...I like a denser, thin crust pizza. I usually leave it sitting there for 30-45 minutes. If you like a fluffier crusted pizza, I would recommend either wrapping your dough lump in plastic wrap (flour the outside of it first to prevent sticking) or placing it in a container and leaving it to rise about 45 minutes (keep checking though to make sure it's not getting crusty). The heat generated by the yeast in the lump and kept inside by the plastic wrap or container will activate the yeast and cause your lump to rise more.
#7- Next, split your dough into 2 pieces (if you're making 2 larges. You could split it into several smaller individual pizzas too). Then roll your dough out or punch and stretch it out to fit your pizza pan or stone.
I like to flour and roll out my dough on my stove's cooktop. It seems to keep the flour all on one surface and it's easy to see and clean up since its light colored flour on a dark cooktop.
#8- Place your rolled/punched out dough onto your pizza stone or your (floured or non-stick sprayed) pizza pan. 
#9- Next add sauce and your favorite toppings. I usually use about 2/3 cup of sauce for the base and about 1 and 3/4 cup of shredded cheese for the last topping. For the pizza in the pic above, I used 2/3 cup of sauce, some spinach, tomatoes, pepperoni, 1 cup of Italian 5 Cheese blend, and 3/4 of a cup of 2% Milk Mexican 4 Cheese Blend (b/c that was already open). I will say I almost always make sure that one of the cheeses has mozzarella in it, since that's a taste typically expected in a pizza. Lightly spray cooking spray on the crust  edges to get it to brown and crisp up (you could always brush butter on too).
#10- Then stick'er in the oven to bake for about 15 minutes at 475F.
Slice up and enjoy with a cool, crisp salad. Yummy!

Friday, August 6, 2010

Recipe: Taco Salads!


I love eating Taco Salads at my local Mexican restaurant, so I knew I had to figure out how to make them at home. I have previously purchased the little premade bowls, but those never tasted anywhere near as good as a the restaurants. I've also seen the take-and-bake type bowls that you can buy the come with a baking form for the bowls, but those are expensive for what you get. I wanted to make my own, so I did. And they tasted FABULOUS.

Beef Taco Salads
Yields 4-5 Salads

Ingredients:
A few drops of Olive Oil
Cooking Spray (optional)
1 lb. lean ground beef
1 can black beans (not drained)
2 cups shredded lettuce
1 cup diced tomatoes (if desired)
1 cup of shredded Mexican blend cheese
1/2 pkg of taco seasoning
Sour Cream (optional, but I like the fat-free version)

Instructions:
#1- Preheat oven to 400 degrees Farhenheit
#2- Brown and drain Meat
#3- Return meat to pan, add undrained can of black beans and 1/2 pkg of taco seasoning to the meat.
#4- Bring to a quick boil, immediately turn down heat to low, and simmer with the lid on stirring occasionally until bowls are ready.
#5- In a pie plate (or other shallow dish), barely fill bottom with warm water and add a few drops of olive oil. Dip both sides of each tortilla into the oil/water mix and place on paper towels to drain.
#6. Place the moist tortillas over a oven safe dessert dishes (or make aluminum foil balls). I sit my dessert dishes in on a cookie sheet. Gently pinch the tortilla sides 5 times to give them the classic pointy bowl look. 
#7. Bake the tortillas for about 5-6 minutes. 
#8. Carefully take them off the dessert dishes and place them directly on the cookie sheet with the bowl side upwards. Spray the edges of your tortilla bowl with cooking spray if you want to achieve that brown edge look. 
#9. Place back in oven and bake another 4-5 minutes.
#10. Spoon meat/bean mixture, lettuce,  tomatoes, cheese, and any other toppings into the bowl. Garnish with sour cream.
Voila! Homemade Yummy Taco Salads! 
Another variation:Instead of using beef, you could use chicken and replace the black beans with green chilies!

Saturday, July 24, 2010

Recipe: Belgian Waffle Mix

So a few weeks ago, CSN Stores contacted me about doing a product review. CSN Stores have everything you can think of from kitchen electrics to lighting (which I did a post on- HERE). I searched and searched their site for what I wanted to review. I asked D and he ultimately is the one who decided what I would review, a Belgian Waffle Maker
On cruises, we both love the Belgian waffles. Frozen Eggos just have nothing on them. He finally convinced me that we could have cruise ship gourmet breakfasts at home....and that sold me! 
I looked around for previous users reviews and the Chef's Choice Belgian Waffle Maker because it had really good reviews.
It came in the mail about a week later, so then it was time to whip up some waffle mix. I really had intended on using a premade waffle/pancake mix, but discovered  we only had enough to make 1 waffle....so on to Plan B. Make my own mix. Here's my recipe:

Waffle Cone Belgian Waffles 
(waffles just a little sweet like waffles cones....just like they make on the cruise)
Yields: 6 Waffles

Ingredients:
- 1/2 tsp salt
- 5 Tbsps of butter, melted
- 3 Eggs
- 1.5 cups milk
- 2 cups all-purpose flour
- 1/2 tsp vanilla
- 1/4 cup sugar

Directions:
1. Preheat the Waffle Iron
2. Mix all the dry ingredients together
3. Mix the wet ingredients together
4. Mix the wet and dry together....lol :)
5. Place 1/4 cup on your waffle iron and cook according to your irons directions. 

That last part is important...1/4 cup only. The first waffle I made I used 1/2 cup, and this is what I ended up with.

So stick with 1/4 cup poured right in the center of the waffle iron and your waffles will be perfect-o. So this waffle iron has 10 heat seatings and  2 different cook settings. One setting for crisp exterior and moist interior and and a second setting for uniform cooking. The first few we cooked using the crisp exterior and moist interior setting...and they were pretty good. The last two we cooked, we used the uniform setting...and they turned out fabulous. Here's a pic of the last one.

Happy Waffle Making!